There’s something magic about the way chocolate and peanut butter swirl together on your fork. Chocolate Peanut Butter Cake delivers that perfect combo moist layers, rich frosting, and zero fancy techniques required.
I’ve tested this one at least fifteen times since 2021, tweaking ratios until the crumb stayed tender and the frosting spread like a dream. My neighbor tasted it and said, “Wait you made this from scratch?” That’s when I knew the balance was right: impressive results without culinary school moves.

Chocolate Peanut Butter Cake Recipe Easy and Irresistible
Ingredients
Method
- Set your oven to 350°F and prepare three 7-inch round cake pans by greasing and lining them with parchment.
- In a large bowl, sift together the flour, sugar, cocoa powder, baking soda, baking powder, and salt.
- Combine the eggs, milk, vegetable oil, and vanilla extract in the dry ingredients, mixing until you have an even batter.
- Dissolve the espresso powder in the boiling water, then gradually stir it into the batter until smooth.
- Evenly divide the batter among the prepared pans using a scale for precise layers.
- Bake the cakes for about 30 minutes, checking doneness by pressing lightly or inserting a toothpick until it comes out clean.
- Let the cakes cool in their pans for 15 minutes before transferring to wire racks to cool completely.
- For the peanut butter buttercream, beat the unsalted butter on medium-high speed for 5 minutes until fluffy and pale.
- Add the creamy peanut butter and mix thoroughly.
- Blend in half of the powdered sugar on the lowest mixer speed, then add the rest until fully incorporated.
- Mix in the vanilla extract and salt, then slowly pour in heavy cream while mixing on low.
- Increase the mixer speed to medium and whip for another 3 minutes, scraping the bowl occasionally.
- To make the chocolate ganache, place chocolate chips in a heatproof bowl.
- Heat the heavy cream until just boiling and pour over the chocolate chips.
- Allow it to sit for two minutes, then stir until the ganache is smooth and glossy.
- Carefully level the cooled cake layers with a serrated knife.
- Place one cake layer on your cake board and spread a layer of peanut butter frosting evenly on top.
- Sprinkle half of the chopped Reese’s peanut butter cups over the frosting, then add more frosting to cover.
- Repeat with the second cake layer, spreading frosting and the remaining chopped Reese’s cups.
- Top with the final cake layer, placing it bottom side up.
- Apply a thin crumb coat of frosting over the entire cake and smooth the sides using a cake scraper.
- Chill the cake for 20 minutes to firm up the crumb coat.
- Apply a thicker final coat of frosting, smoothing the sides well, then chill for another 20 minutes.
- Use a piping bag or squeeze bottle to drizzle the chocolate ganache along the edges, letting it drip down the sides.
- Spread the remaining ganache evenly over the top of the cake with an offset spatula.
- Pipe swirls of peanut butter buttercream around the cake’s top edges using a Wilton 1M tip.
- Decorate the swirls with whole Reese’s peanut butter cups.
- Store the cake in an airtight container in the fridge for up to 5 days and bring to room temperature before serving.
Notes
- Keep the cake refrigerated in an airtight container up to 5 days. Let it warm up a bit before serving for the best flavor and texture.
Why You’ll Love This One
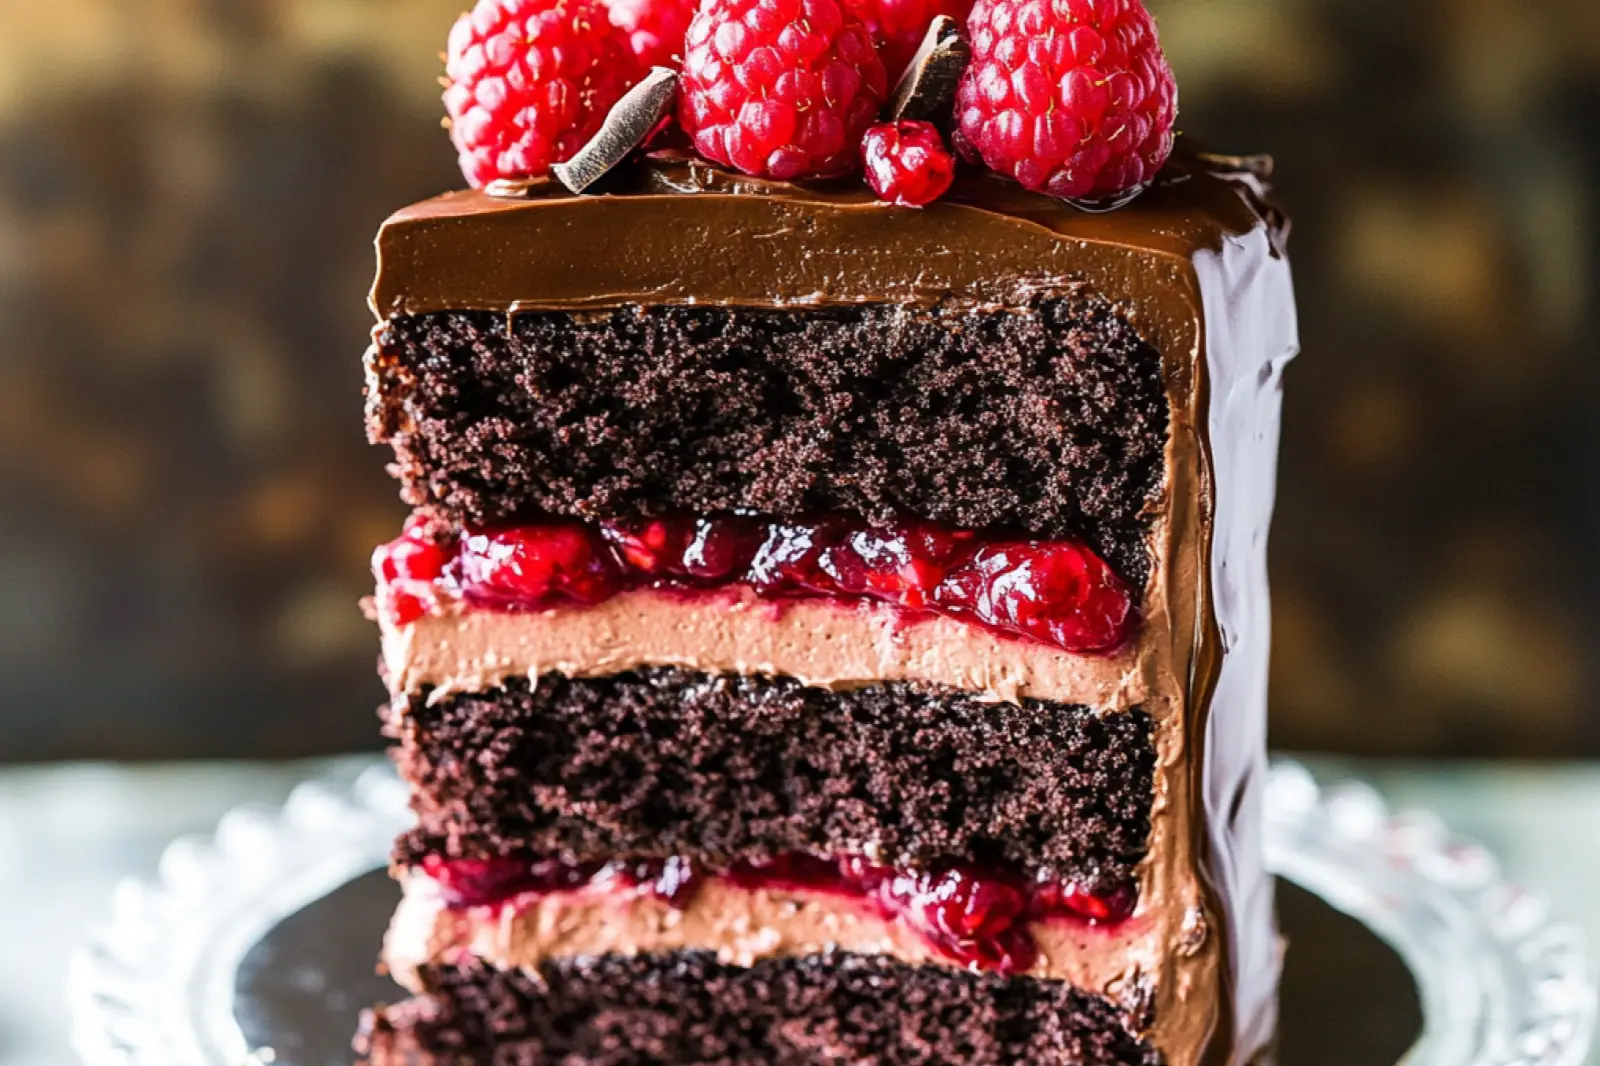
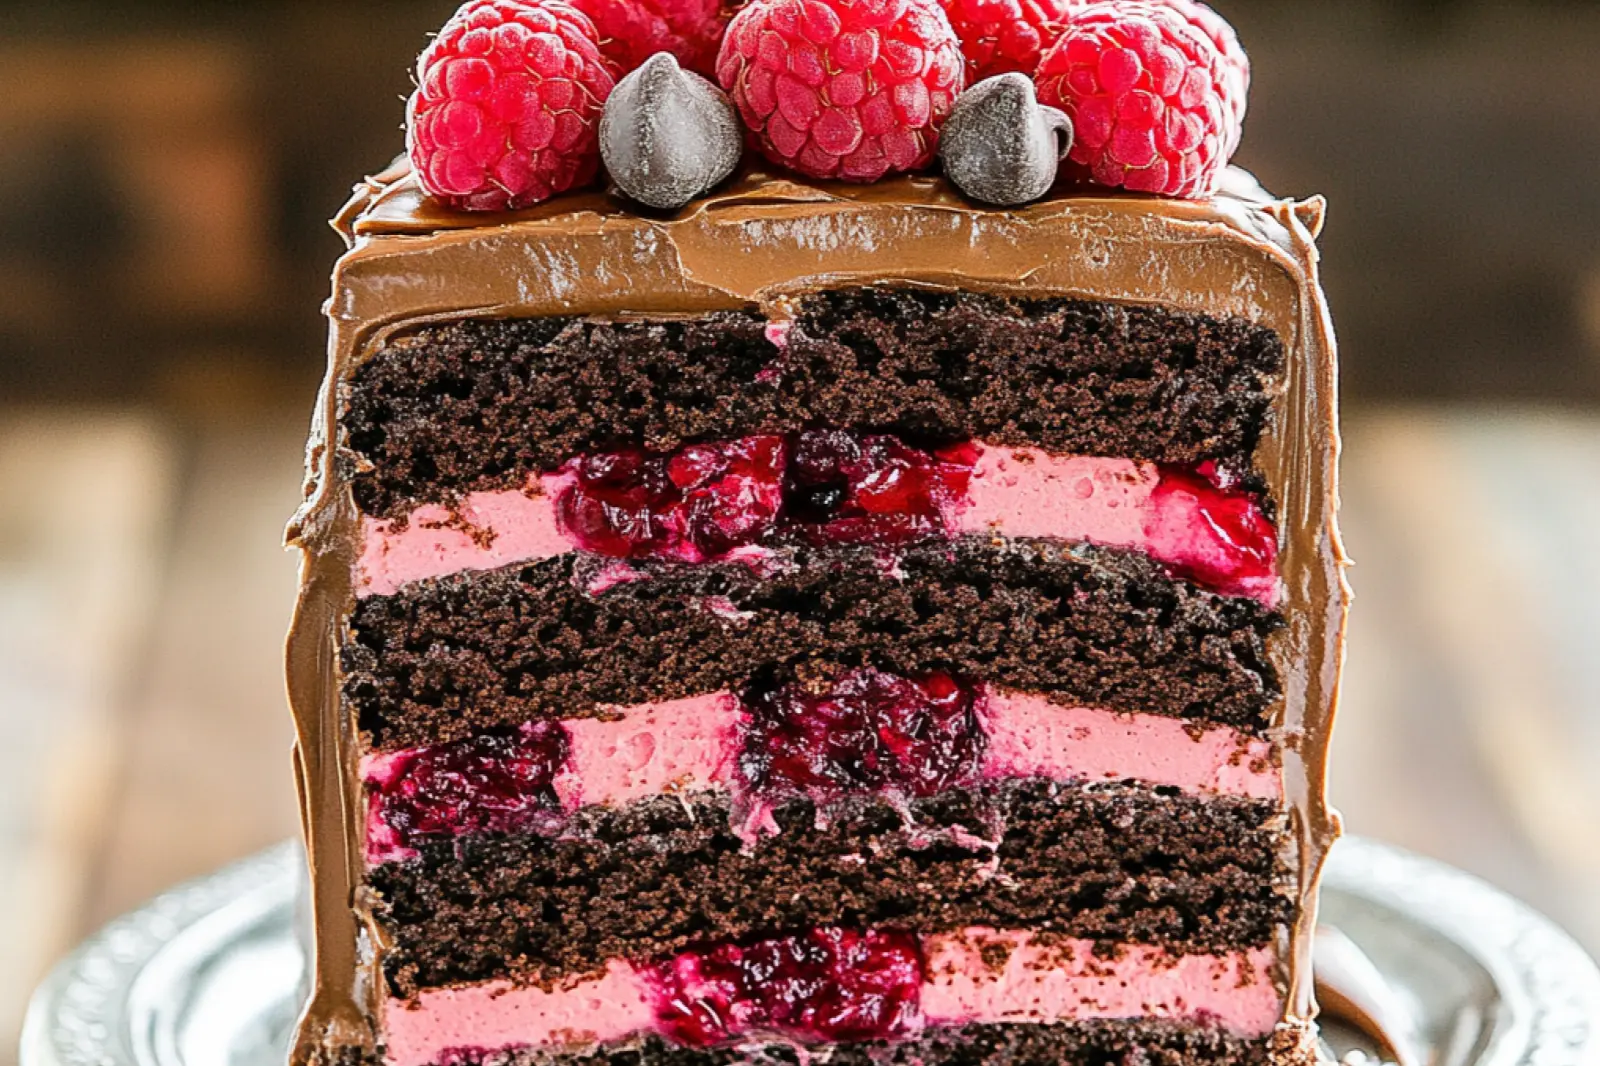
Picture this: rich dark chocolate cake meets creamy peanut butter frosting, topped with a glossy ganache drip and actual Reese’s cups. It’s the dream combo for anyone who grew up sneaking candy from the Halloween stash.
- No fancy techniques required whisk everything in one bowl, bake, and stack.
- Feeds a crowd fourteen generous slices mean everyone gets seconds at birthday parties or potlucks.
- Make-ahead friendly bake the layers a day early, frost when you’re ready, and store leftovers for up to five days.
- Showstopper presentation the ganache drip and piped swirls look bakery-level without culinary school moves.
Key Ingredients That Make It Work

You’ll recognize almost everything here no specialty store runs. The ingredient list might look long, but it breaks into three simple sections: cake, frosting, and ganache.
Dark cocoa powder gives deep chocolate flavor without bitterness. Espresso powder amplifies that richness (you won’t taste coffee, just bolder chocolate). Boiling water thins the batter into a pourable consistency that bakes up incredibly moist. For the frosting, unsalted butter whipped for five full minutes creates the fluffiest base, while creamy peanut butter adds that signature Reese’s vibe. Semisweet chocolate chips and heavy cream melt into a silky ganache in under three minutes.
| Ingredient | Easy Swap |
|---|---|
| Buttermilk | Regular milk (already listed as option) |
| Vegetable oil | Melted coconut oil or canola oil |
| Dark cocoa powder | Regular unsweetened cocoa (lighter color, milder taste) |
| Creamy peanut butter | Natural peanut butter (stir well first; frosting may be slightly softer) |
How the Layers Come Together
Start by whisking dry ingredients in a large bowl flour, sugar, cocoa, leaveners, and salt. Add eggs, milk, oil, and vanilla, then whisk until smooth. Dissolve espresso powder in boiling water and pour it into the batter; the mixture will look almost soupy, but that’s the secret to a tender crumb.
Divide batter evenly among three greased and parchment-lined 7-inch pans (a kitchen scale helps here). Bake at 350°F for about thirty minutes, until the tops spring back when touched. Cool in pans for fifteen minutes, then turn out onto a wire rack.
While layers cool, whip room-temperature butter for five minutes until pale and fluffy. Beat in peanut butter, then powdered sugar in two additions. Finish with vanilla, salt, and a drizzle of heavy cream, whipping for three more minutes. For ganache, heat cream until bubbly, pour over chocolate chips, let sit two minutes, then stir until glossy.
Assembling Without the Stress
Level cooled layers with a serrated knife so they stack flat. Place the first layer on a cake board, spread frosting with an offset spatula, scatter half the chopped Reese’s cups, and add more frosting. Repeat with the second layer and remaining candy. Top with the third layer, bottom side up for a flat surface.
Apply a thin crumb coat just enough frosting to seal in loose crumbs then chill twenty minutes. Add a thicker final coat, smooth with a cake scraper, and chill again. Use a squeeze bottle or piping bag to drizzle ganache around the edges, letting it drip naturally. Pour remaining ganache on top and spread smooth. Pipe peanut butter frosting swirls around the perimeter and press whole Reese’s cups into each swirl.
Pro Tip: If ganache drips too fast, let it cool another minute. If it’s too thick to drip, microwave for ten seconds and stir.
Quick Assembly Checklist
| Step | Time | Key Move |
|---|---|---|
| Level & stack layers | 10 min | Use serrated knife; spread frosting evenly |
| Crumb coat | 5 min | Thin layer seals crumbs |
| Chill | 20 min | Firms buttercream for smooth final coat |
| Final coat & smooth | 10 min | Generous frosting, scrape sides with bench scraper |
| Chill again | 20 min | Prevents ganache from melting frosting |
| Ganache drip & decorate | 10 min | Squeeze bottle control; pipe swirls last |
Serving and Storage
Slice with a sharp knife dipped in hot water and wiped clean between cuts you’ll get clean edges through all three layers. Serve at room temperature for the fluffiest frosting texture; cold slices are firmer but less creamy.
Store leftover slices in an airtight container in the refrigerator for up to five days. Pull them out about thirty minutes before serving so the peanut butter frosting softens back to that dreamy, spreadable consistency. If you want to freeze unfrosted layers, wrap each tightly in plastic wrap and foil, then freeze for up to two months. Thaw overnight in the fridge before assembling.
Note: Ganache can harden in the fridge. Let slices sit at room temperature, or microwave individual pieces for eight to ten seconds to restore the glossy drip.
Join me for more irresistible recipes and daily cooking inspiration on Pinterest!
FAQs ( Chocolate Peanut Butter Cake )
Can I use natural peanut butter instead of regular?
Yes, but make sure it’s well-stirred and at room temperature. Natural peanut butter can make the frosting slightly less stable, so chill the finished cake for 30 minutes before serving. The flavor will be more intense and slightly less sweet.
How long does this recipe stay fresh?
Store covered at room temperature for up to 3 days or refrigerated for up to 1 week. The peanut butter frosting actually helps keep the chocolate layers moist. Bring to room temperature 30 minutes before serving if refrigerated.
What size pans work best for this dessert?
Two 9-inch round pans give the perfect layer height and even baking. Make sure to grease and flour them well, or use parchment paper circles. If using 8-inch pans, increase baking time by 5-8 minutes and watch for doneness.
Can I make the layers ahead of time?
Absolutely! Wrap cooled layers tightly in plastic wrap and freeze for up to 3 months. Thaw completely before frosting. You can also bake layers 1-2 days ahead and store covered at room temperature for easier assembly.
Why is my peanut butter frosting too thick?
Add 1-2 tablespoons of heavy cream or milk gradually while mixing. Cold butter or peanut butter straight from the fridge can cause thickness. Let ingredients come to room temperature first, then beat for 3-4 minutes until fluffy.

You’ll love how this Chocolate Peanut Butter Cake turns out three tender layers, silky frosting, and that glossy ganache drip that makes everyone ask if you ordered it from a bakery. The whole thing comes together in about ninety minutes, most of it hands-off cooling time while you clean up or sneak a spoonful of leftover frosting. Every bite delivers that nostalgic Reese’s vibe with a homemade warmth no store-bought box can match.
Want to switch things up? Swap the dark cocoa for Dutch-process if you prefer a mellower chocolate flavor, or stir mini chocolate chips into the peanut butter frosting for extra texture. If you’re serving a smaller crowd, bake the batter in two eight-inch pans instead of three sevens you’ll get taller slices and a slightly shorter bake time. A trick I picked up from my pastry mentor: brush each cooled layer with a tablespoon of simple syrup before frosting to lock in moisture for days. Store leftovers covered at room temperature for two days or refrigerate up to five, pulling slices out thirty minutes early so the frosting softens back to that dreamy, spreadable consistency.
I’d love to see your version tag me when you snap a photo of those ganache drips or tell me which kiddo claimed the slice with the most Reese’s cups. Did you grow up hiding peanut butter cups in your lunch box, or was chocolate cake your birthday tradition? Either way, this one’s built for those moments when you want to wow the table without stressing in the kitchen. Save the recipe, bake it for someone you love, and watch their face light up at first bite.