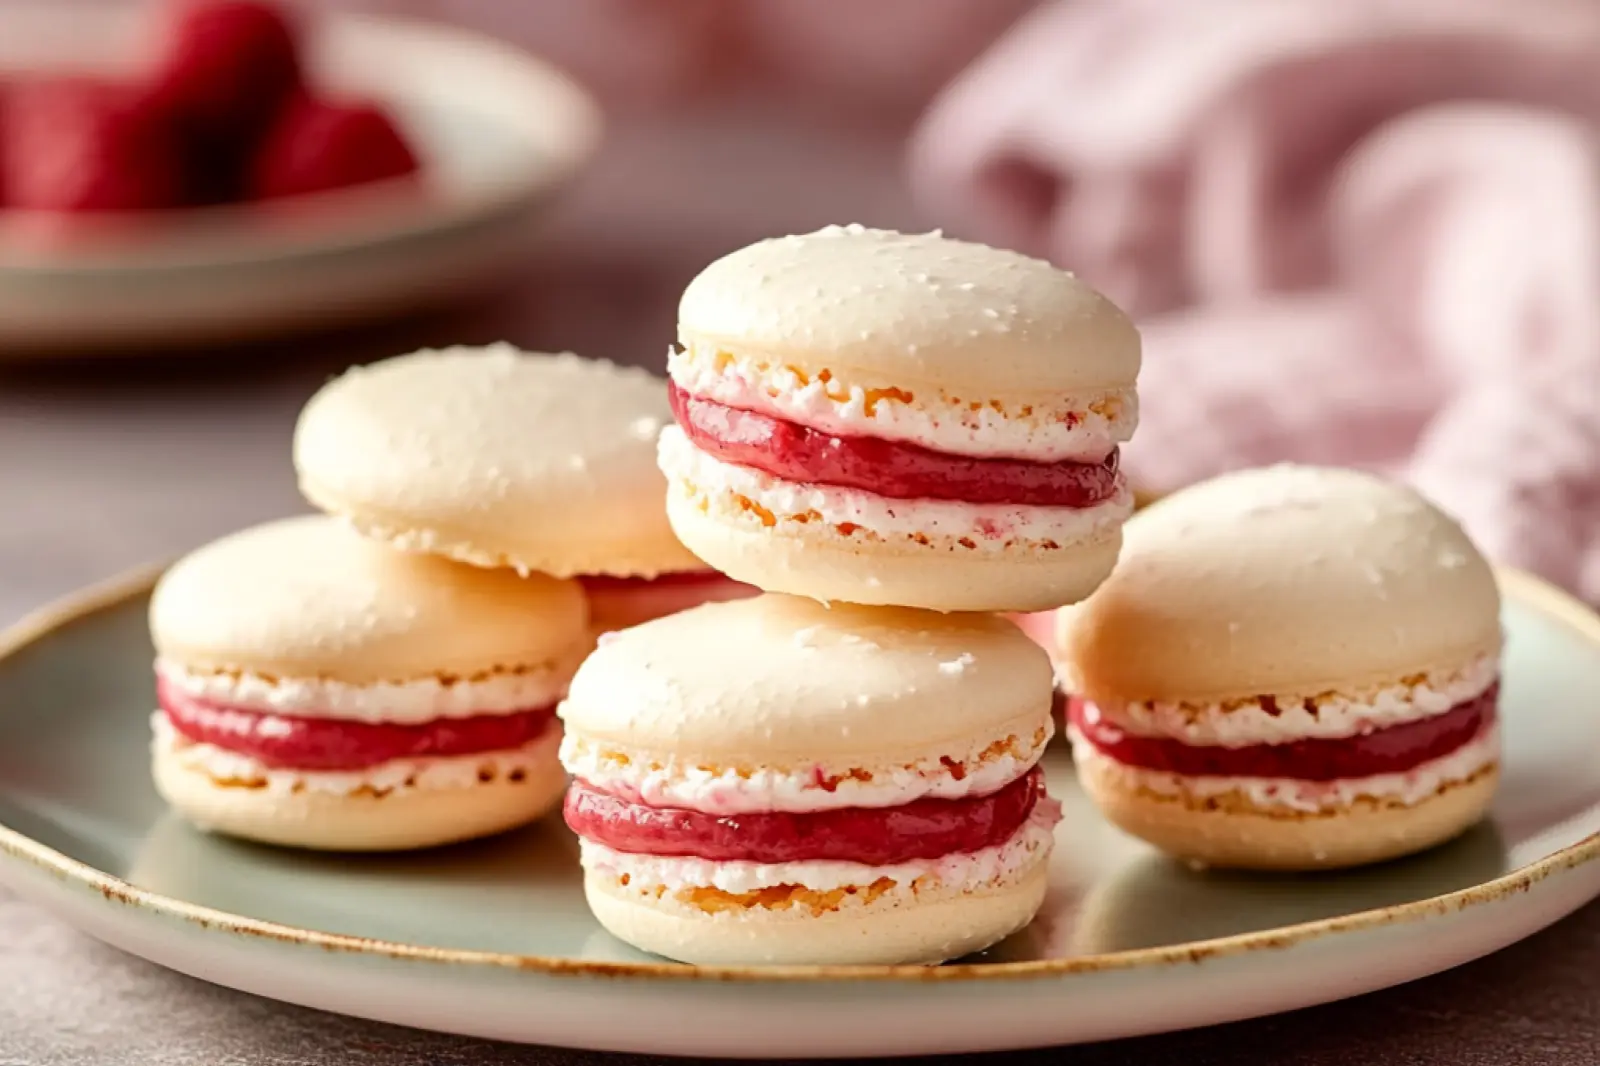
Delicate shells that crack just right, a creamy vanilla center that melts on your tongueVanilla Macarons are easier than you think. They look fancy, taste incredible, and once you nail the technique, you’ll wonder why you waited so long to try.
I spent a summer testing these in culinary school until my counters were covered in pastel rounds. The trick? Letting the batter rest until it forms that glossy “skin” before bakingit’s what gives you those perfect little feet. After 50+ batches and years developing recipes, I can tell you: this method works every single time.

Easy Vanilla Macarons Recipe for the First Time
Ingredients
Method
- Line two baking sheets with silpats or parchment and fit a piping bag with a round tip, setting it aside.
- Grind almond flour and powdered sugar together in a food processor until superfine, then set the mixture aside.
- Separate eggs and weigh out 120 grams of egg whites; reserve yolks for other uses.
- Using a stand mixer with a whisk, beat egg whites on low until foamy, increase to medium-low speed and gradually add granulated sugar, then increase to medium speed until stiff peaks form.
- Add vanilla bean paste or extract and optional gel coloring, mixing briefly to combine.
- Fold half of the almond flour mixture into the meringue gently, scraping the bowl, then fold in the rest until smooth and glossy with the batter flowing in a thick ribbon off the spatula.
- Transfer the batter to the piping bag and pipe round drops about 1 to 1.5 inches wide onto prepared sheets.
- Tap baking sheets several times to release air bubbles and use a toothpick to pop any visible bubbles for a smooth surface.
- Allow the piped shells to dry in a well-ventilated space for 20 to 30 minutes until they form a slight skin that is no longer shiny or sticky.
- Preheat oven to 320°F (160°C) while the shells dry.
- Once dried, bake one tray at a time on the lower center rack for 16 to 18 minutes; test doneness by gently wiggling macarons to ensure the top is set and does not move.
- Allow macarons to fully cool on baking mats before gently peeling them off, about 10 minutes.
- Beat unsalted butter in a bowl or stand mixer until creamy.
- Add powdered sugar and vanilla to the butter, then mix on medium speed for about three minutes until the buttercream is light and fluffy.
- Fill a piping bag fitted with a tip of choice with the buttercream.
- Match similarly sized macaron shells and pipe a swirl of buttercream onto the flat side of one shell, leaving a small border.
- Place the matching shell on top to sandwich the filling.
- Refrigerate assembled macarons for at least one day to soften shells and develop flavors, or serve immediately as preferred.
Notes
- For best results, ensure your macaron shells have formed a proper skin before baking to avoid cracking. Store assembled macarons in an airtight container in the fridge for up to 3 days. Bring to room temperature before serving to enjoy the full flavor.
Why You’ll Love This Recipe
These Vanilla Macarons feel fancy but follow a straightforward French method that works beautifully once you understand the rhythm. The shells bake up crisp with those signature ruffled feet, while the vanilla buttercream stays silky and not-too-sweet.
- Beginner-friendly approach: No complicated Italian meringue or temperamental syrupjust whipped egg whites and smart folding.
- Pure vanilla flavor: Using vanilla bean paste or extract in both the shells and filling creates that classic, nostalgic taste.
- Worth the wait: After a day in the fridge, the shells soften just enough to create that perfect chewy-crisp bite.
- Customizable: Add a few drops of gel food coloring for pastel pink, mint green, or keep them natural ivory.
Key Ingredients You’ll Need
The magic happens with just a handful of pantry staples. Here’s what makes these shells and filling come together seamlessly.

For the shells: Almond flour and powdered sugar get processed together for that signature smooth surface. Egg whites whip into glossy peaks with granulated sugar, while vanilla bean paste (or extract) adds warmth without changing the color. A tiny drop of gel food coloring is optional but fun.
For the buttercream: Unsalted butter creamed with powdered sugar and vanilla creates a filling that’s fluffy, pipeable, and melts on your tongue. After years of testing fillings, I’ve found this ratio stays perfectly creamy without oozing out when you take a bite.
How the Method Works
The French method relies on whipping egg whites with sugar until stiff, then gently folding in the almond flour mixture until the batter flows like lava. Getting the consistency right is everythingtoo thick and your shells crack, too thin and they spread flat.
Pro Tip: The batter should flow off your spatula in a thick ribbon and settle back into itself within 10-15 seconds. It’ll look slightly grainy as it drips, then turn glossy as it smooths out in the bowl.
After piping, you’ll bang the pan against your palm or counter to release trapped air bubbles. Then comes the crucial rest period20 to 30 minutes lets a thin skin form on top, which is what creates those adorable feet during baking.
Baking and Assembly Timeline
| Step | Time | What to Watch For |
|---|---|---|
| Prep & fold batter | 20 minutes | Batter flows in ribbon, settles in 10-15 seconds |
| Pipe & rest shells | 20-30 minutes | Surface no longer shiny, feels like skin when touched |
| Bake (per tray) | 16-18 minutes | Shells don’t wiggle when gently nudged |
| Cool completely | 10 minutes | Peel easily from mat without sticking |
| Make buttercream | 5 minutes | Light, fluffy, holds shape when piped |
| Mature in fridge | 24 hours (optional) | Shells soften, flavors meld beautifully |
Troubleshooting Common Issues
Cracked tops: Usually means the batter was under-mixed or the shells didn’t rest long enough before baking. Make sure that skin forms completelyit should feel dry to the touch.
No feet: Over-mixed batter or an oven that’s too hot can prevent feet from forming. Try lowering your temperature by 10°F and checking your folding technique.
Hollow shells: This happens when the meringue is over-whipped or the oven runs too hot. Stick to medium speeds when whipping egg whites and use an oven thermometer to verify your temperature.
Smart Swaps and Variations
| Instead of… | Try This | Notes |
|---|---|---|
| Vanilla bean paste | Pure vanilla extract | Same amount, slightly less visual flecks |
| Buttercream filling | Jam, lemon curd, or ganache | Keeps shells crisp longer |
| Plain vanilla | Add ¼ tsp almond extract | Creates a subtle French bakery flavor |
| White shells | 2-3 drops gel food coloring | Pastel shades work bestavoid liquid dye |
Serving and Storing Your Macarons
Pair similarly sized shells together before fillingit makes assembly faster and looks neater. Pipe a swirl of buttercream on the flat side, leaving a small border so it doesn’t squish out when you sandwich them.
For best texture: Let filled macarons rest in an airtight container in the fridge for 24 hours. The shells soften just enough to create that perfect chewy center while staying crisp on the outside.
Storage: Keep in the fridge for up to 5 days or freeze for up to 3 months. Let frozen ones thaw in the fridge overnight, then bring to room temperature 20 minutes before serving for the best flavor.
Join me on for more irresistible recipes and daily cooking inspiration Pinterest!
FAQs ( Vanilla Macarons )
Why do my shells crack during baking?
Cracked shells usually result from insufficient resting time or oven temperature that’s too high. Let your piped shells sit for 30-60 minutes until they form a skin before baking. Bake at 300°F and avoid opening the oven door during the first 15 minutes.
How long should I age egg whites?
Age egg whites for 24-48 hours at room temperature, covered with plastic wrap. This reduces moisture content and helps achieve better meringue stability. Alternatively, you can use fresh egg whites and add a pinch of cream of tartar for similar results.
What causes hollow shells?
Hollow shells occur from over-whipped meringue or oven temperature fluctuations. Whip meringue only to stiff peaks, not beyond. Maintain consistent oven temperature and avoid rapid temperature changes by keeping the oven door closed during baking.
How do I fix lopsided shapes?
Lopsided shells result from uneven piping or air bubbles in the batter. Use a template under your parchment paper and pipe straight down. Tap the baking sheet firmly after piping and use a toothpick to pop any visible air bubbles.
How long do they stay fresh?
Store assembled treats in an airtight container in the refrigerator for up to one week. They actually taste better after 24 hours as the filling softens the shells. For longer storage, freeze unfilled shells for up to three months.

You just made Vanilla Macarons from scratchcrisp shells, creamy centers, and those adorable little feet. They’re surprisingly doable once you get the rhythm down. You’ll love how they turn out after that overnight rest in the fridge, when the shells soften just enough and the flavors really bloom.
Try swapping the buttercream for tangy lemon curd or raspberry jam if you want something brighter. Store extras in an airtight container in the fridge for up to five days, or freeze them for a rainy-day treat. A trick I learned in culinary school: let them come to room temperature for twenty minutes before serving so the filling gets silky again.
I’d love to see your pastel stackstag me if you share a photo! Did you grow up sneaking French pastries from a bakery case, or is this your first macaron adventure? Either way, tuck this recipe away for birthdays, bridal showers, or any time you want to feel a little fancy at home.